- Continue Shopping
- Your Cart is Empty


How To Remove, Grease, and Install Bottom Brackets - Threaded and Pressfit [Video]
Words by: Liam Woods
Servicing your cranks or bottom bracket should be part of your regular maintenance on your mountain bike. Just a simple clean on your cranks and dust seals can make a huge difference in how they spin, as well as helping all your parts last a bit longer. Oh yeah, there is also that super annoying thing called the bottom bracket creak, which again can often just be from dust working its way between seals or bearing surfaces. With a simple cleaning, you can make that awful creaking your friends are complaining about go away. We are going to show you how to clean and re-grease your cranks and bottom bracket for both threaded and press-fit style bottom brackets. I'll go over some tips and common mistakes that I have learned over the years of working on all types of bikes. I’ll be doing the service on an Unno Dash with a threaded bottom bracket (or bb, for short) using an E*Thirteen XCX crankset with a 30mm spindle, and for the pressfit I will be using a Salsa Cutthroat with a PF92 bottom bracket and using the same E*Thirteen XCX crankset with a 30mm spindle. Both bikes are using E*Thirteen bottom brackets.
When To Service Your Bottom Bracket:
First, you should know when it's best to service or clean your bottom bracket and crankset. At the very minimum, I do it about each season change, but normally more. Every three months or so I'll take the cranks out and if it’s a threaded bb, I’ll remove the bb and do the full service. Around the three month mark is normally enough time, even in the best conditions for dirt to work its way into the small gaps and contact points around the crankset and bottom bracket area. In the summer in SoCal, I probably do it more like every four weeks of solid riding on a bike. With the fine dust, it makes sense that the service period is even less and I find if you wait much longer, you tend to get creaking. Yes, I'll get into creaking and how to fix and prevent that in just a bit.

Tips for Low Maintenance:
Some tips to try and get the most ride time between services, and the best one for your entire bike, and especially any moving part like the cranks and bottom bracket, is to just keep it clean. After a ride, give the area a wipe down, try to floss out any dust or grit that might be sitting around any parts. This will help keep dust from working its way into the areas to cause wear and create creaking. Along the same lines, I would give your bike a wash every couple of rides. Not only does a clean bike look nice, but you can inspect parts and, again, help keep dirt, dust, or whatever from getting in the small areas of your entire bike, including the crankset/bottom bracket area.
As you will see in the actual service part, grease will also be your friend to help keep all of the above-mentioned dirt, dust, and whatever else your tires pick up, from working its way into the spots you don’t want it. The grease works as a waterproof barrier and keeps the parts inside clean and the crap on the outside out.
Creaking and What to Look For:
Yep, that amazing bottom bracket creak, tick, pop that your bike always gets rears its ugly head and your local mechanic magically gets it to stop for a few months before it’s back. No, your local mechanic doesn't suck. Well, at least I hope they are good, but that's just a part of riding bikes in the dirt. With lots of spinning parts, creaking, ticking, popping, squeaking, or whatever other noise your bike might make is common and happens to most, if not all, bikes. When your bike creaks, everyone jumps to the bottom bracket as the issue, especially if they have a pressfit bottom bracket. Many times it is your bottom bracket, cranks, or chainring, but sometimes, albeit rare, it’s because of your pressfit bottom bracket. But that has got much better and even in the last year or two, I haven’t really seen any creaking caused by press fit bb’s themselves, threaded creak just as much.
To try to diagnose your creaking, there are two simple tricks, and I'll try to explain these as best as possible. First, you will be pushing on the cranks from side to side. To do this, stand on the drive side of the bike with the drive side crank at the bottom, or pedal closest to the ground. Then tilt the bike away from you a bit and give it a decent push, maybe two. If you hear a creak or pop, then it’s likely the bottom bracket or suspension pivots. I would go to the other side of the bike and do the same thing. Try to get it to happen both ways. That will let you know it's something taking a side load and is either loose or a dirt contact surface. That doesn’t mean your bottom bracket or suspension pivots need replacing, but a cleaning and a re-grease.
The other way to find a creak easily is to stand on either side of the bike. It’s best to have the bike on some carpet, or a shop mat so the wheels don't slip. You will grab each tire with each hand so your left hand is on the rear tire and your right hand is on the front tire, then push and pull the wheels/bike away and towards each other. If you get any creaking or popping here that is most likely the headset or shock mounts, and not the bottom bracket or lower suspension pivots.
Many of these noises can be solved by a simple clean and re-grease of that part that you think is creaking. The headset is a very common part to get creaking, and the bearings are normally still good, with maybe a little dirt on the contact surface areas. Pulling that apart similarly to how we will do the bottom bracket is also great maintenance and can get rid of the noise you found.
Upgrading or Replacing Your Bottom Bracket:
When it comes time to replace or upgrade your bottom bracket, not only is finding the correct bottom bracket to work for your bike key, but there are also oftentimes many options to choose from. Many times the crank manufacturers make the bottom bracket you need and that is often the best and safest choice to choose from. You can also see if the manufacturer makes a ceramic option if you want to go that route. That is my first suggestion and for the most part, will work great without any issues. Next would be to go to a manufacturer that makes bottom brackets for all frame styles and crank standards. The big brands that come to mind are Wheels Manufacturing, Chris King, or Ceramic Speed. I’d say that going with Wheels Manufacturing gets you the best quality product for the money. If I don’t go with the crank manufacturer for the bottom bracket, I pick Wheels Manufacturing, especially if you have a pressfit bottom bracket as they have “thread together pressfit options” and those are a great choice if they fit your frame and crank standard. Wheels Manufacturing will likely be about the same or better quality than your stock bottom bracket, with quality bearings and seals. I find these work really well and I would suggest these for most mountain bike style riding. Ceramic Speed makes some very fancy bottom brackets and is certainly not for the shy of price, as the name suggests, they are all ceramic bearings. I am currently running one on my gravel bike and I have never had a bottom bracket spin so freely. If that translates to easier pedaling, it's hard to say, but I will say just by spinning the cranks you can tell Ceramic Speed bearings are the highest quality out there. One thing to note with Ceramic is that the service interval I mentioned above will be cut in half or less, and will require a bit more work as well than what we are doing here in this How-To.

Threaded BB:
1. Lay Out Tools & Workspace
First, make sure you have the correct tools. I like to layout the tools I think I am going to use, as well as some grease and paper towels. If your bike is especially dirty maybe some cleaning solution as well. I find laying out a clean organized workspace makes working on the hardest jobs easier, especially since you know where to find your tools fast. This process is called knolling. If you want to nerd out on some tool slang and how to be an organized mechanic, look that up.

Tools needed to work on a E*Thirteen threaded bottom cracket: Park Tool BBT-9, E*Thirteen Bottom Bracket Tool, Park Tool TTH-8, Teflon Tape, and Sizors
2. Remove Crankarm
Next, you will remove your crankarm. Most new cranks only have one crankarm that is removable, so make sure you are going to remove the correct one. Most cranks use an 8mm hex wrench and also most new cranks are self-extracting. This means that you will need to loosen your crank and continue to loosen the crank until it comes off. You will find some resistance even after you have broken the initial bolt, as the bolt is backing up into the crankarm itself and pushing the arm away from the spindle. If your cranks are not self-extracting, you will need the corresponding crank arm extractor tool, so pretty much two types here.
3. Pull Spindle and Cranks, Keep Spacers and Dust Caps in Order
Pull out the spindle and the other crank arm you didn’t remove. I suggest keeping this spindle and crankarm together, as most are not supposed to come apart. As you pull the spindle, take a good look at what spacers you have and where they belong. Oftentimes, you will have two dust covers for your bearings. Also, check which way those were pressed against the bearing, as well as what spacers and on what side. You will want to make sure those stay in that order and put them back on just how they were. As you pull each spacer, dust cover, and spindle, take some time and clean all those parts before setting them on the bench. Not only will you be putting down clean parts, but you can inspect these parts to see what might be damaged.

(Left) Driveside crank arm off, with spacers and dust caps stuck to the crank. (Right) Dirty Spindle and Bottom Bracket Cup

Clean Bottom Bracket Cup (Left), Clean Spindle, Crank, Dust Covers and Spacer (Right)
4. Clean Cranks & Bottom Bracket Cups
If you didn't already, clean all of the crank surface, spindle, crankarm/spindle interface, and bolt. Try to remove all dirt and grease that was left on there. Next, clean out the bottom bracket bearings by removing all the dirt and grease left behind.
5. Bonus step - Remove, Clean, Grease and Install Chainring
Not done in the video but mentioned, if you haven't done this in a while, and especially if you are experiencing creaking, I would remove your chainring. Most will be direct mount and should be pretty simple to remove. SRAM, Shimano, RaceFace and E*13 all have different direct mount methods, but all will be the same once removed. Remove and clean all contact surfaces, then add a little bit of grease to the contact areas where the chainring meets the crankarm, and then tighten it back on. Make sure you get it very tight as these have a tendency to come loose from time to time.

Remove the chainring and clean contact surfaces

Grease contact surfaces, install chainring and tighten to spec
6. Remove Threaded Bottom Bracket
Remove the bottom bracket on the frame. You will need the specific bottom bracket tool to your style bottom bracket. Park Tool makes most, if not all, tools you will need to remove your bottom bracket. Once you have the right tool, you will need to know which way to turn the bottom bracket. Start with your non drive bottom bracket cup, and this cup will be normal threads. Usually you will go counter-clockwise to loosen up the bottom bracket cup. Next, move to the drive side and now this will be reverse threads, so you will loosen up the bottom bracket cup going clockwise. Continue to spin both sides out until they are out of the frame. Make sure to grab the centerpiece if you have one in your frame. There isn't always a centerpiece, but if you have one, take it out. Some like the SRAM DUB bottom bracket stays on one side and is hard to remove.

Remove the bottom bracket from the frame with the correct tools
7. Clean Threads and Bearings on Both Bottom Bracket and Frame
Clean the threads on your bottom bracket as well as any other grease on the bearings or inside the cups. Do the same to the bottom bracket centerpiece. Then go to the frame and clean those threads and inspect for any damage.

Clean threads on frame so there is no dust or grease on the frame
8. Continue to Clean Everything Before Installing
Go through all the parts one more time and make sure everything is clean and has no grease or dirt left on it. Make sure all the parts are ready for install.
9. Teflon Tape - The Secret Step
This is my secret step that many people don't know about, so you are welcome! I use Teflon pipe tape to wrap the threads of the bottom bracket cup before installation. The Teflon tape helps snug up the bottom bracket and make sure it doesn't come loose. Also, since there is some material between the two metal surfaces, I find there to be much less creaking over time with Teflon tape.

Start wrapping the teflon tape around the threads of the bb, in the correct dirrection
So to start, you need to know which bottom bracket cup you are installing first, and then think about which way you are turning it. Let’s start with the non-drive cup. As you remember when we were removing it, the cup threaded in regularly. So when installing the Teflon tape, we want to do one complete layer around the threads with a little bit overlapping, about 5-9mm or so. THE WAY YOU WRAP THE THREADS MATTERS. We want to wrap the threads so the overlapping part of the tape is going with the bottom bracket as we spin it in. Hard to explain in text, but if you have the non-drive cup, and are looking at the bike from the non-drive side, we will be turning the cup clockwise to tighten. So when we start to wrap the Teflon tape, we want to start at the top of the cup if looking at the bike from the non-drive side, and go towards the front of the bike and around the bottom of the cup and back up to the top with a small overlap. This should have the overlap section and “tail” of the tape going towards the back of the threads. So when you tighten the cup up, the tape stays put and doesn’t unravel once you go to tighten.

Overlap the teflon tape just by a little bit, you want the tape to not pull right off when you start to thread the cup into the frame
And the same goes for the drive side cup. We will be tightening this counterclockwise and we want to start the tape at the top of the bottom bracket cup and start to wrap it around the cup towards the front of the bike, around the bottom, and back up to the top with a small overlap. Try to make both cups as tight as possible, and you want the tape to not unravel right away. The Teflon tape is a solid trick once you get it down. It might take a practice wrap or two. The good news is this stuff is cheap and with one roll you can do tons of bottom brackets.
10. Grease Threads, Thread in Bottom Bracket and Torque to Spec (or really tight)
Now we will add some grease to the threads on the frame. Don’t be shy with the grease, as the extra will work its way out. I grease all the contact surfaces, threads, and the centerpiece of the bottom bracket cups. Then, start to thread the cups in. You can also add a little bit of grease on top of the Teflon tape. It won't hurt to have a bit more. Then make sure you are threading the cups the right direction and get those as tight as possible with your hands. You might get a little more resistance with the Teflon tape.

Grease is your friend, use it!
When you have it in as far as your hands can spin, grab your tool and spin the rest. Once snug, I tighten up the drive side cup first, and I make that thing really tight. Some have a torque spec, but I make it as tight as possible without getting crazy. In a normal stance, give it a good yank or push. You don't want this coming loose. Then do the same to the non-drive cup.
11. Grease Spindle, Bearings and Put On Spacers and Dust Covers
Add some grease to the installed bottom bracket bearings, making sure to put a decent layer all around the bearing cup and inner race on both sides. Then grab your spacers and start to put them back on the crank the way they came off. Once you have the spacers and the dust cover on, add some more grease to the dust cover side that will contact the bearing and also on the spindle. Then, slide the spindle into the bottom bracket and give it a couple of taps with your hand to make sure it's all the way through. Then grab the other dust cover and any spacers there might be and push those on as well.

Grease the outside of the bb bearings, inside, and spindle surfaces

Once you push the spindle through, stack on the spacers in the correct order you took them off in
12. Grease Crank Interface and Start to Tighten Crank
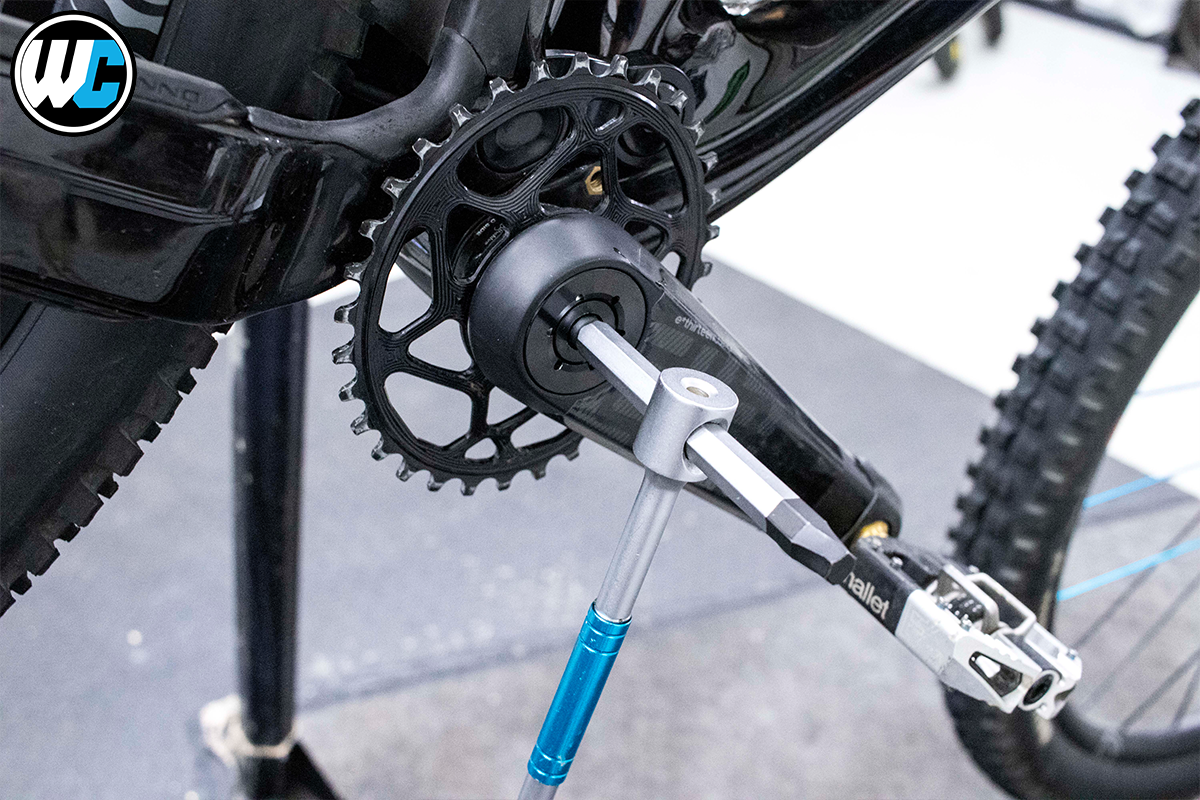
Add some extra grease to where the crank arm mates with the spindle, as well as the crank bolt. Once you do that, grab your 8mm wrench and start to tighten up the crank arm. Spin the bolt in all the way until it's snug.

Grease spindle interface, line up cranks and start to tighten to spec
13. Tighten Crank Fully and Check Torque Rating
Look up the torque spec on your crank arms. Many say it on the bolt, but if it doesn’t, it's easy to find the online user manual or installation guide to see that torque spec. Many are around 40-50nm, which is pretty damn tight. Once you have that fully tight, you’re down to the last step!
14. Tighten Up Preload Adjuster (if there is one)
Most cranks now have a preload adjustment on the spindle. For SRAM and Raceface, there is a pinch bolt. For E*Thirteen it's just a dial. Either way, you want to make sure the cranks are pushed in all the way so that the side with the preload adjuster is as far away from the bottom bracket as possible. Then start to dial in the preload adjust ring until it makes contact with the bearing dust cover. Maybe give it a touch more but you don’t need to overdo this guy, it just holds the cranks in place. Then tighten up the pinch bolt if there is one and you are good to ride!

Press Fit BB:
1. Lay Out Tools & Workspace
First, make sure you have the correct tools. I like to layout the tools I think I am going to use, as well as some grease and paper towels. If your bike is especially dirty maybe some cleaning solution as well. Laying out a clean organized workspace I find makes working on the hardest jobs easier, as well as laying out your tools so you know where to find them fast. This process is called knolling. If you want to nerd out on some tool slang and how to be an organized mechanic, look that up.

Tools needed to remove a press fit bottom bracket: Park Tool BBT-30.4, Park Tool BBP-1.2, Park Tool HMR-8, Park Tool THH-8
2. Remove Crankarm
Next, you will remove your crankarm. Most new cranks only have one crankarm that is removable, so make sure you are going to remove the correct one. Most cranks use an 8mm hex wrench and also most new cranks are self-extracting. This means that you will need to loosen your crank, and continue to loosen the crank until it comes off. You will find some resistance even after you have broken the initial bolt, as the bolt is backing up into the crankarm itself and pushing the arm away from the spindle. If your cranks are not self-extracting you will need the corresponding crank arm extractor tool. There are pretty much two types here.

3. Pull Spindle and Cranks, Keep Spacers and Dust Caps in Order
Pull out the spindle and the other crank arm you didn’t remove. Keep this spindle and crankarm together, as most are not supposed to come apart. As you pull the spindle, take a good look at what spacers you have and where oftentimes you will have two dust covers for your bearings. Also, check which way those were pressed against the bearing, as well as what spacers and on what side. You will want to make sure those stay in that order and put them back on just how they were. As you pull each spacer, dust cover, and spindle, take some time and clean all those parts before setting them on the bench. Not only will you be putting down clean parts, but you can inspect these parts to see what might be damaged.

4. Clean Cranks & Bottom Bracket Cups
If you didn't already, clean all of the crank surface, spindle, crankarm/spindle interface, and the bolt. Try to remove all dirt and grease that was left on there. Next clean out the bottom bracket bearings. Remove all the dirt and grease left behind.

Clean bottom bracket cups (left), clean crank, spindle, and dustcovers (right)
5. Remove Press Fit BB
In order to remove your press fit bb, you will need some tools to do that. If you have a 30mm spindle, Park Tool makes a really good removal tool, the BBT-30.4. I highly recommend this tool, and if you have a smiler spindle, then the Park Tool BBT-90.3 will fit the bill. Push either of these tools through and give it a good whack. It might take a couple of solid hits to knock each side loose.

Grab your removal tool, make sure you have good contact on the bearing and not the frame, and smack away!
6. Clean Frame, Bottom Bracket and Bearings
Once the bottom bracket is out, clean all the parts, the frame surface, and look for damage. Clean the bottom bracket cups and the bearings. I try not to reuse pressfit bottom brackets, or at least the bearings, as normally when you remove them you cause a side load on the bearings and they tend to get a bit of damage on them.
7. Clean, Clean, Clean
Continue cleaning all the parts, making sure all the grease and dirt left behind is gone and everything is clean and ready to be installed again.
8. Grease Press Fit BB Cups and Frame Interface
Add some grease to the pressfit bb cups and frame interface. Don’t be shy, put a good layer of grease on both. The frame grease will press into the frame and the bb cup grease will push out of the frame, leaving you with some on both sides.
9. Install Bottom Bracket with Press Fit Tool
The most important part of installing a pressfit bottom bracket is actually two parts. You want to have the correct bearing race if possible, so if you have a 30mm spindle try to have a race that also has a 30mm spindle cup on there. Secondly, only press in one cup at a time. This is important because the one side of your frame you are not pressing into remains square. If you try to press in both cups at the same time you have a chance of them both going crooked and even causing permanent damage to the frame. Not a good move if you have a carbon frame. So press in one at a time. I start with the non-drive side cup, but it doesn’t really matter. Press one, then the second, making sure they are both in flush.

Grab your pressfit tool, with the right bearing race, and press in one side at a time
10. Grease Spindle, Bearings and Put On Spacers and Dust Covers
Add some grease to the installed bottom bracket bearings, making sure to put a decent layer all around the bearing cup and inner race on both sides. Then grab your spacers and start to put them back on the crank the way they came off. Once you have the spacers and then dust cover on, add some more grease to the dust cover side that will contact the bearing and also on the spindle. Then slide the spindle into the bottom bracket and give it a couple of taps with your hand to make sure it's all the way through. Then grab the other dust cover and any spacers there might be and push those on as well.

Grease up spindle contact surfaces, and bb cup bearings
11.Grease Crank Interface & Start to Tighten Crank
Add some extra grease to where the crank arm mates with the spindle, and then also the crank bolt. Once you do that grab, your 8mm wrench and start to tighten up the crank arm. Spin the bolt in all the way until it's snug.

Grease inside crank and bolt, as well as add the spacers to the spindle that you had taken off int he same order
12. Tighten Crank Fully and Check Torque Rating
Look up the torque spec on your crank arms. Many say it on the bolt, but if it doesn’t it's easy to find the online user manual or installation guide to see that torque spec. Many are around 40-50nm, which is pretty damn tight. Once you have that fully tight, you have one more step!

13. Tighten Up Preload Adjuster (if there is one)
Most cranks now have a preload adjustment on the spindle. For SRAM and Raceface there is a pinch bolt. For E*Thirteen it's just a dial. Either way, you want to make sure the cranks are pushed in all the way to the side with the preload adjuster is as far away from the bottom bracket as possible. Then start to dial in the preload adjust ring until it makes contact with the bearing dust cover. Maybe give it a touch more but you don’t need to overdo this guy, it just holds the cranks in place. Then tighten up the pinch bolt if there is one and you are good to ride!
Final Thoughts:
Wow, if you made it this far hopefully you have a clean, happy, and creak-free bottom bracket and crankset. As mentioned at the beginning, this is a great thing to do to your bike every few months even if your bike is silent. Hopefully, you learned a few tricks and can get this done on your own and even help a friend out once in a while. It’s always worth trading for beer or food, of course!


This article was written / authored by Liam Woods. Liam has been in the bicycle industry for over 10 years as a racer, professional mechanic, service manager and as of late, media and content creator. Liam has ridden thousands of different bikes, ridden countless components, tested endless MTB apparel of all kinds and written reviews on it all. He's a key piece to the Worldwide Cyclery "All Things MTB" content creation puzzle. He also makes consistent appearances on the Worldwide Cyclery YouTube channel and Instagram.
© 2026 Worldwide Cyclery


