- Continue Shopping
- Your Cart is Empty
OneUp Components EDC Tool & 100cc pump [Rider Review]
Our "Rider Review" article series features the honest reviews from verified purchasers of Worldwide Cyclery. They contain the photos, thoughts, feedback & overall review you are looking for.
When OneUp sets out to make a new product, they have a plan to set a new standard. That's exactly what they were doing when they were making the EDC Pump. Not only will you have your pump, you will have all of your tools. Our friend, Reid, has been running it. See what they think!
Overview
I have always lugged a backup around with me on my mountain bike rides. This was a convenient way to have water at the ready as well as carry anything I may need out on the trail. Over time that pack tends to fill with more items and get heavier until I occasionally clean it out. On warm summer rides (and even sometimes in cooler weather) you end up with a sweaty back and jersey soaked at the end of the ride. I recently started looking to see if there were options to get all that weight off my back and be a little more “free” on my rides. This is where the OneUp Components EDC Pump and Tool system comes in.
After looking at things like seatpost bags (not easy to use with a dropper post), attachment bands/zip ties and other ways to carry items on my frame I settled on the OneUp Components EDC system along with a water bottle to replace my pack. With the EDC system I can carry all the necessities for a local trail ride in something the size of a pump that attaches next to my water bottle cage. I bought the larger 100cc size pump as it has room to store the EDC Tool kit system and an extra canister for the pliers and tire plug kit I also bought. You could also choose to bring a CO2 cartridge in lieu of the canister/tire plug kit.
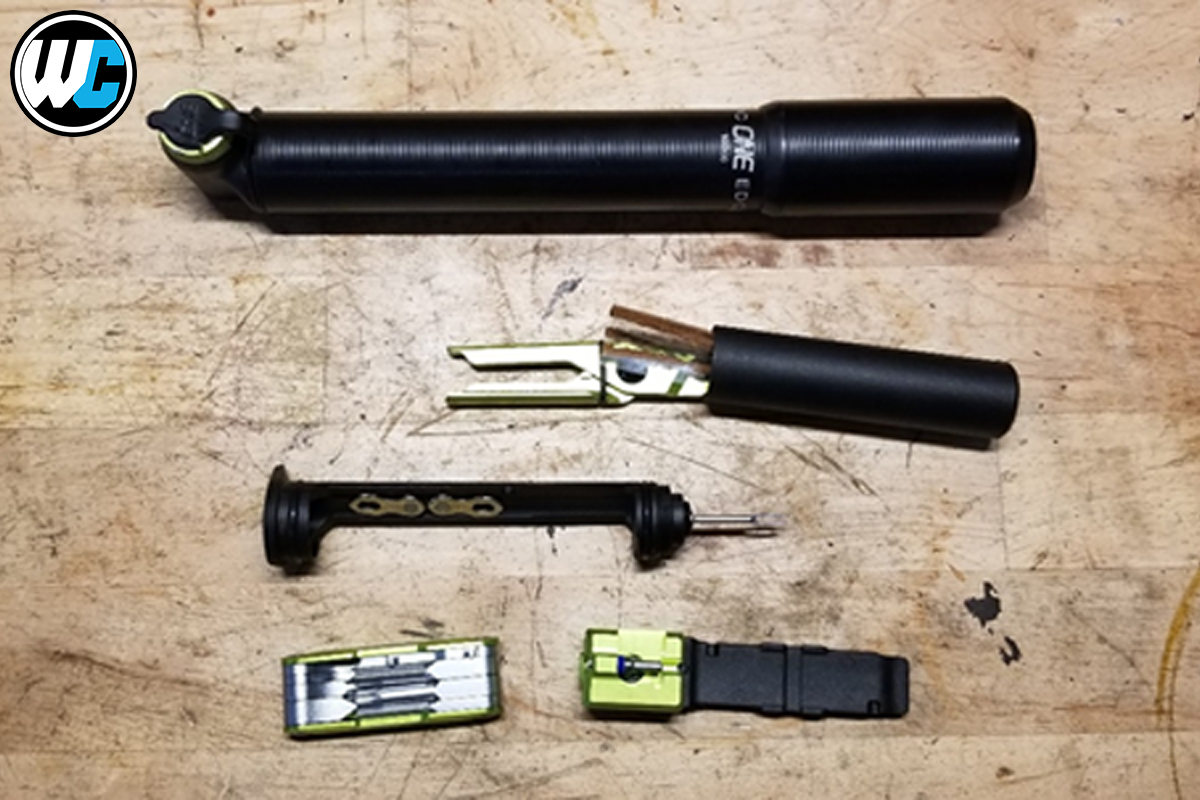
The multi-tool in the kit has a number of hex head sizes as well as a T25 Torx and flat head screwdriver, similar to the compact multi-tool I usually carry in my backpack. It has a unique feature in that it uses the screwdriver tool to double as a quick link remover and an 8mm hex head when combined with the 5mm hex head. I haven’t tried to actually remove a quick link with this tool and from videos I saw online it isn’t necessarily easy, but seems like it would do in a pinch. Since I also have the pliers in the canister, I figure I won’t use this feature of the tool.
When the multitool is removed you see another tool that is most obviously a tire lever with a chain breaker mounted on the end. This little gem has a few tricks up its sleeve that took me a bit to figure out. In addition to the lever and chain breaker there are 4 sizes of spoke wrenches, a presta valve core remover and extra chainring bolt. If you rotate the chain breaker 90 degrees either way the tire lever becomes a handle and you have 2 slots on each side of the chain breaker that correspond to spoke sizes 0, 1, 2, 4. If you rotate the chain breaker 180 degrees there is a slot in the chain breaker that matches the flat sides of a presta valve core allowing them to be screwed in or out. You may have to loosen the bolt holding the chain breaker onto the lever to rotate it, and oh by the way that bolt you loosen is the spare chainring bolt.

With the above tools removed from the tool holder chassis you will see 2 holes in the chassis that allow you to clip in the 2 halves of a spare quicklink. My Shimano ones didn’t snap in very securely so I added a small piece of electrical tape just to make sure I don’t lose them when this is disassembled trailside. At the end of the chassis is a small threaded insert that can be used hold a CO2 cartridge or in my case the “fork” for installing tire plugs.
Moving onto the tire plug kit this added the canister that is able to hold a pair of small pliers, some “bacon strip” tire plugs and a fork tool for installing tire plugs. It came with a lot of bacon strips in it, so I took some out and left just a few in the canister which can be replenished as needed. This also leaves a little room to store things like a little cash or other small hardware you might want to carry.
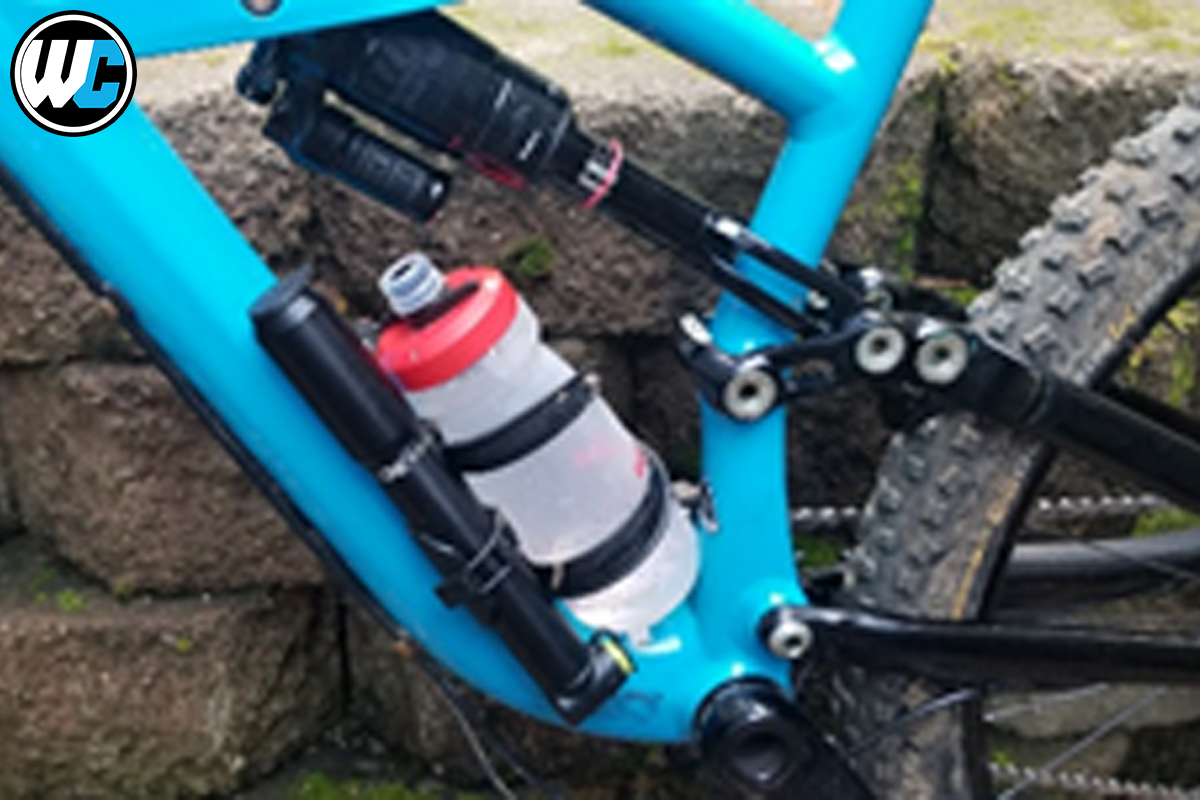
The pump came with a water bottle mount so that I could install it below my water bottle cage and clip the fully assembled pump and tool kit it into it. I also was able to buy a 2nd pump mount from OneUp that I could install on another bike and just move the pump/tool kit between bikes as needed. I would note that I put the pump on the bike with the pump head down as the tool kit snaps into the bottom of the pump handle. It actually goes in very securely and is somewhat hard to pull out, but in the off chance it came loose I wouldn’t want the kit to fall out of the pump on the trail.
Final Thoughts
I now am able to ride many trails without carrying any sort of pack. I still will carry a pack on longer rides where I want more water or ones where I carry things like the chinbar for my helmet or other pads for the downhill part of a ride. In those cases I will have a few extra items like a derailleur hangar, CO2 cartridge, spare tube, food, etc in the pack. However, I will still keep the OneUp pump and tool on my bike taking that weight out of my pack.


